联想 ThinkPad P1隐士笔记本一键快速重装系统win10教程下载
联想 ThinkPad P1隐士笔记本电脑如何重装系统?该款电脑拥有多项处理器,独显可选 RTX A1000、RTX 2000 Ada等,功能强大、移动方便,采用超轻时尚设计,非常适合内容创作者,并具有创新功能。今天就来为大家介绍该款电脑一键重装win10教程。
安装方法
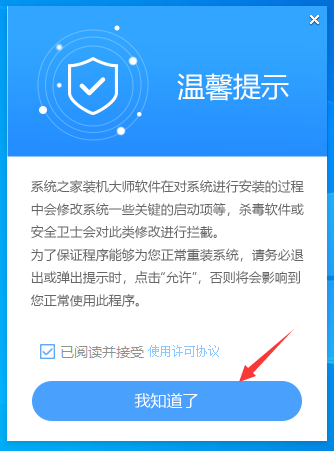
1、下载【知识兔装机大师】。下载完毕后,关闭所有的杀毒软件,然后知识兔打开软件,软件会进行提示,仔细阅读后,点击我知道了进入工具。
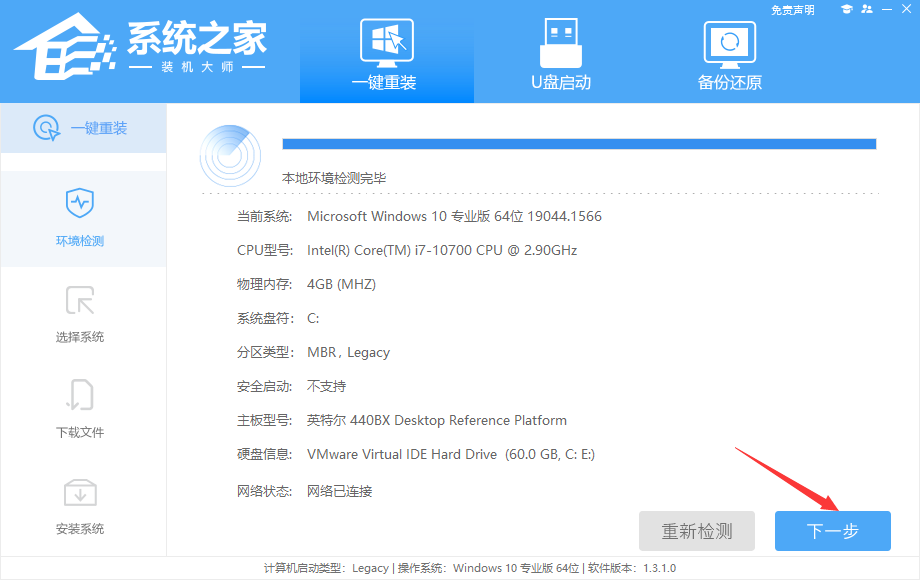
2、进入工具后,工具会自动检测当前电脑系统的相关信息,点击下一步。
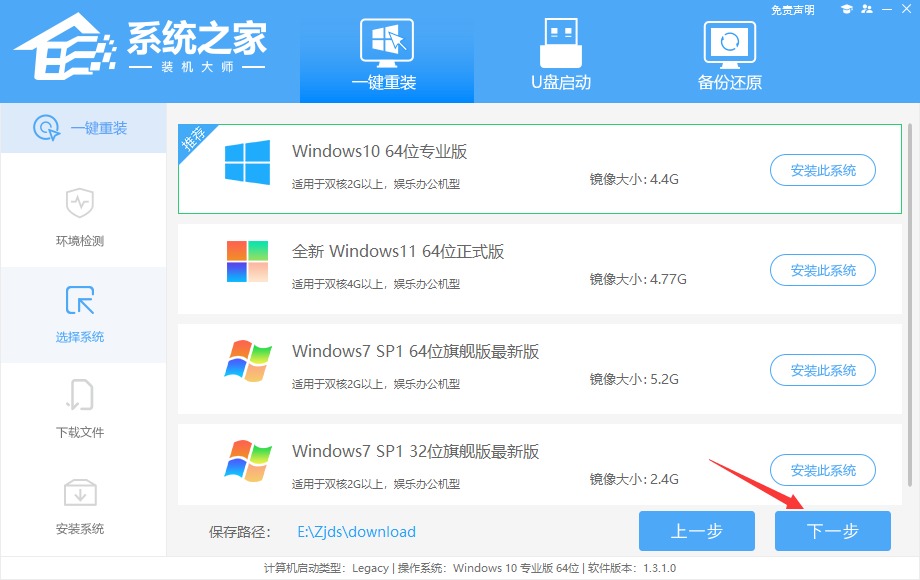
3、进入界面后,用户可根据提示选择安装Windows10 64位系统,点击下一步。
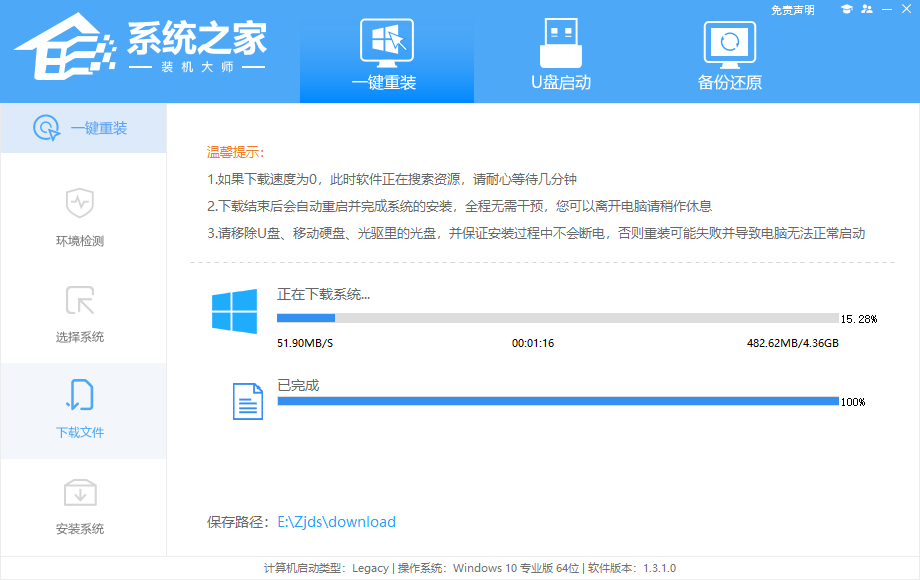
4、知识兔选择好系统后,待PE数据和系统的下载。
5、下载完成后,系会自动重启系统。
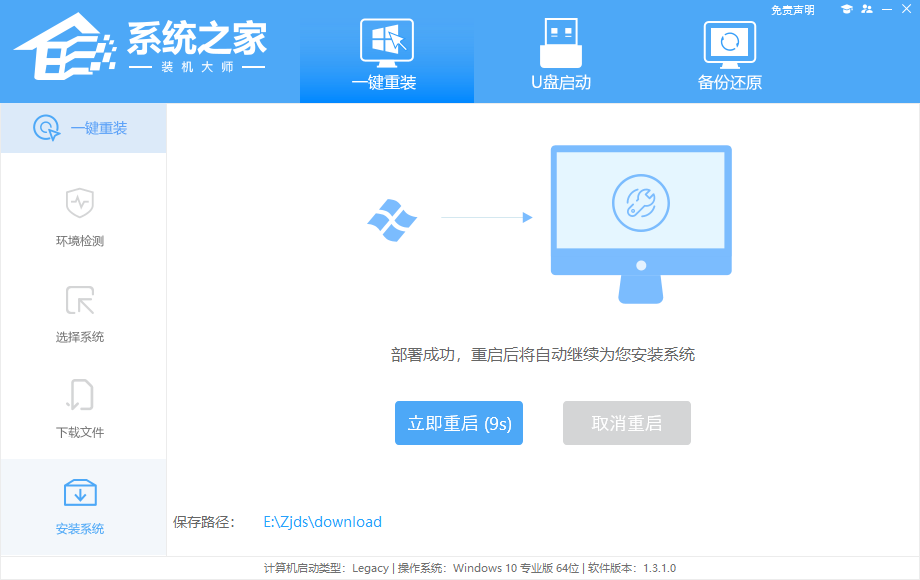
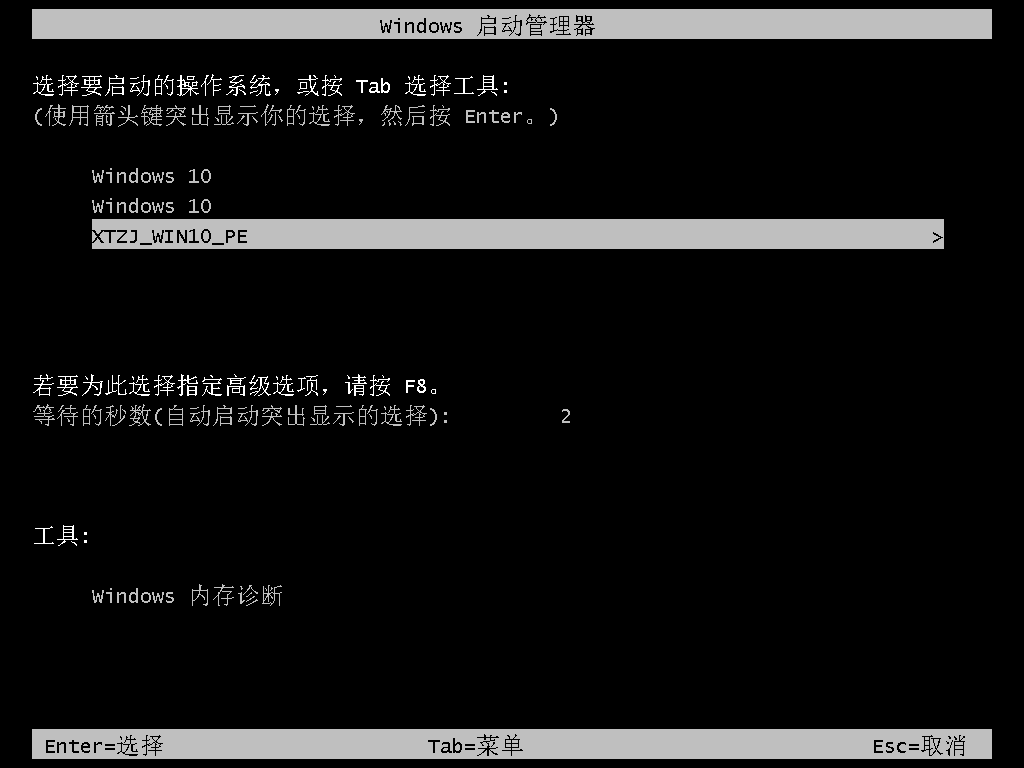
6、重启系统后,电脑将会进入一个启动项的选择,这时我们选择【XTZJ_WIN10_PE】回车。
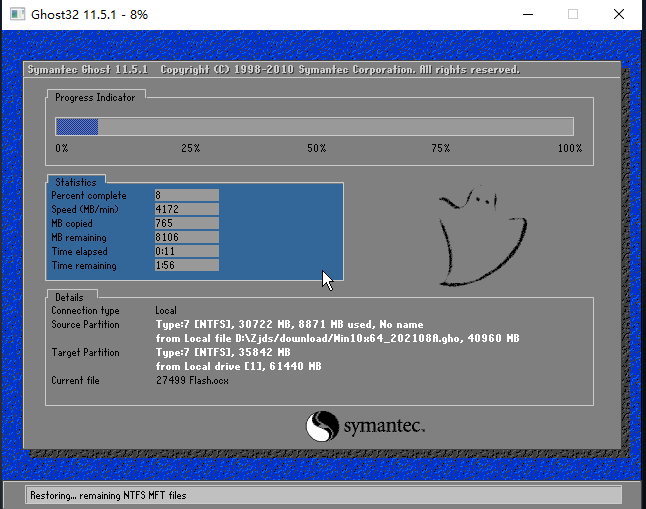
7、进入后,系统将会自动进行备份还原,等待完成。
8、系统备份完成后,将会再次重启,自动进入系统安装界面,这时等待系统安装完成就大功告成了。

下载仅供下载体验和测试学习,不得商用和正当使用。
![PICS3D 2020破解版[免加密]_Crosslight PICS3D 2020(含破解补丁)](/d/p156/2-220420222641552.jpg)


![[Win] Steinberg Dorico Pro 音乐绘谱软件下载](https://www.xxapp.net/wp-content/uploads/2023/01/2023011217232437.png)